Thursday, June 22, 2017

Valentine's Day Decor

Hi everyone! A month or so ago I finished my second semester in college! I plan on dedicating my time this summer to catching up on the blog and getting new things out. I am really looking forward to the things that I have planned. I have wanted to post about this decor for a while. I am so happy that I finally got to them!

So I will start out by talking about Valentine's Day Decor!


This cute HME and with the Heart as the O is way cute and I loved how it turned out.


The Valentine's Accessory Blocks are so adorable.


This is the close up of the Home Kit Heart!


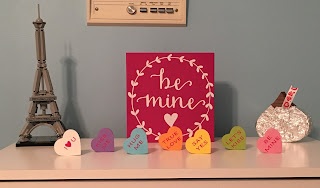
This is the cute set up on top of my dresser!


This is my TV stand display.
The next few pictures are close ups of the pictures that are in the display.


This is another display on top of a container that I have.

So that is all of the Valentine's Day Decor! I really enjoyed making all of the things that I did. I especially love February and Valentine's Day because it is my birthday on Valentine's Day!

Anyways, sorry that it has taken me so long to post this. I have been busy with other things that I have been working on! I have a really big announcement for my blog/business coming at the beginning to middle of July! I can't wait to tell you guys!
Have a great day!
~Bethany

Thursday, April 27, 2017

January Highlights

Hello Everyone!
Sorry it has been awhile. It has been crazy with school and family things going on. That is why I am posting January Highlights now!


So here is this adorable sign that I made. I got the small slat sign and the vinyl from The Wood Connection. It was really fun doing this project because it was my first time doing reverse vinyl. How you do reverse vinyl is when you paint your base coat on (what you want the letters or the wording to be), and then what you do is put the vinyl on, then you paint over the vinyl the same as the base coat (so it won't bleed when you put the top coat on). After you put the base coat on again on top of the vinyl you then do how ever many coats you think you need to of your top color. After your paint is dried you peel the vinyl off (I usually like to use an exacto knife, although some spots might scratch into the paint of the words, I just take a small brush and go over it so it doesn't look to bad).
For example, on this board I painted the whole front white, and then once it was dried I put the vinyl on. After that I put one more coat of white on it so it wouldn't bleed. After the white was dry I painted it a few coats with blue and then once it was dried I peeled off the vinyl. Also, a warning- don't let your vinyl sit on the wood for too long because when you go to peel it off it is harder and when you are finished the place where you put your vinyl feels sticky. I learned that the hard way with a few of the letters on this board.


I also did these cute tiny conversation hearts also from The Wood Connection. I think that they are so cute and I love how they turned out.

I also got some clay for myself. I have been watching a you-tuber who does a lot with clay and turns them into charms. I thought that I would give some a try.


I think that these cookies are so cute!


I thought that the pencils would be easier to do and they totally were! I loved how these turned out.


These hearts are so cute with their cute little faces.


And here are all three pictures together. All of these were really fun to make. If you guys think that I should do more clay things let me know! I don't have anything planned for right now but if you guys would like to see anything make sure to let me know!


Also in January I finished up the Christmas gifts for my mom, sisters, and sister-in-law. I posted more about this HERE, with a tutorial along with it!

Well that was pretty much all of the things that I did during January because I started my second semester in college and I just got back to work after my surgery.

I will hopefully be posting a couple more posts really soon. I have a week off with nothing that I have to do but work on crafts and blog before I have to start my summer semester and get back to work.

Hope you guys have a great day. If there are any suggestions you have for me feel free to let me know either by emailing me or leaving it down in the comments!

~Bethany 

Tuesday, March 21, 2017

Crocheting Some Days Away!

Hello Everyone!
So I feel like I haven't shared a lot of the crocheting projects that I have been working on. My birthday was last month and I got a lot of yarn so that I could crochet more! And then after that I got onto a crocheting kick which wasn't too bad because I got to finish up some old projects that I have been meaning to finish up for a while!
So let me get started by saying that I love to crochet it makes me so happy so whenever I have a chance to learn a new skill within crocheting I am all for it! I am really into looking at and following a long with one of my favorite crocheting bloggers, Sarah from Repeat Crafter Me (you can look at her blog HERE). It's so cute, she really does an amazing job with everything that she comes up with I have to try everything! One of the blog posts that she shared was where she crocheted a border around a piece of fleece and that is where I got the idea of making my sister-in-law's baby shower gift. I made her a blanket by crocheting around a big piece of fleece. You can also go HERE to look at when I talked about my sister-in-law's baby shower.


In this picture it was folded in half, it was a pretty big blanket to keep my little niece warm! :)


This is the close up on the boarder. It took a while to get this boarder done but I think that it turned out great.

What I did on this blanket was I used a skip stitch blade and it made little holes where you see the stitches and fleece come together. Then I used Red Heart yarn that was especially for babies! It is super soft I loved the colors that it came in.

The next crochet project was one that I started on my birthday to give to my brother and sister-in-law (Brandon and Courtney)for my niece for her blessing day.
I used a Sweet Roll from Premier Yarns that is called Cheesecake Pop. I used a total of three balls of this yarn. I used a J crochet hook. I think that the over all project turned out great!


This is the full blanket! I love how the colors were different every other row, it looks so pretty!


This is the close up of the stitches. I did two rows of single crochet and then two rows of double crochet.


And this is one of the edges. There were many possibilities that I could do for the boarder such as doing just a single crochet boarder with a different yarn or the same, but I decided to leave it the way it was! I think that it looks really great!

Well those were the projects that I finished up just recently! I hope you liked seeing some of them because a lot more are coming your way!

~Bethany

Saturday, March 4, 2017

Recipe and Notes Plaques Tutorial

Hello Everyone!
I hope everyone has been doing well. I have been meaning to write this a while ago but I have been busy with school.
Since I had my eye surgery in December I didn't really have the time to make the plaques that I am going to show you. I finally finished all of them in the middle of January but I didn't get the chance to take pictures of them until the beginning of February. I made one of each for myself, my mom, my sisters, and my sister-in-law for their Christmas gifts. I also got these cute plaques at The Wood Connection!


So this is what the Recipe plaque came with. It came with vinyl that said "Recipe", a dowel so that it could stand, and a little clip so that it could hold a recipe!


What you will need is the plaque kit that I showed you above, your choice of paint (since the vinyl is a light tan color I would recommend doing a darker shade of paint), a paint brush, a vinyl applicator, and sand paper or a sanding block. You also need wood glue to put the clip on at the end. For the paint on this one I am using Delta paint and it is called Tahiti Blue.


So after you do how ever many coats of paint that you would like you will put the vinyl on where you want it to go.


This is what it looks like when the vinyl is on. All that is left to do is put the little clip on and then you are set.


And there it is! To finish off the recipe plaques I sprayed it with a gloss spray so that if anything would get on it while you are cooking you could just wipe it off!


These are all of the Recipe plaques that I made! I let everyone pick their own colors so that it would go with their kitchen.


This is the Notes plaque kit. It has everything that the Recipe plaque had but the vinyl says Notes.


All of the materials that you need are about the same except you will need chalk paint instead of regular paint and you don't need to use the clip if you don't want to. I decided to leave it off in all of the ones that I did.


So on this you need to put two coats down of the chalkboard paint. This is when it has two coats on it.


Before you condition the chalkboard paint put the vinyl on first so that it will be able to actually stick.


To condition the chalkboard paint before you can actually write on it: take a piece of chalk and cover the whole surface and then wipe off. This is before I wiped it off.


And this is after I wiped it off. And now it is ready to be written on! I didn't spray this with anything, if I would have they wouldn't have been able to write on it.


I gave my family this plaque with chalk and a chalkboard eraser.


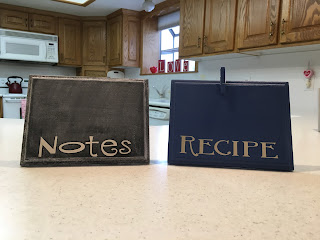
And there you go. There are the finished plaques!


And here are all of the plaques that I made!

I hope that you guys like my first ever tutorial! If you guys think that I should do more just let me know! Also I am now doing custom orders for wood and crochet projects, so feel free to email me at createwithbethany8@hotmail.com or you can dm me on my Instagram account!

Have a great day guys!

~Bethany 

Wednesday, February 8, 2017

November and December Highlights

Hello Everyone!
The past couple of months have been kind of crazy.
I finished up my first semester in college. It was one crazy semester, but I was really happy that I finally had it done. In between times that I had to finish up my classes and study for my finals, I had some time to do some crafts. I will fill you in about those crafts in a minute. The week after my last final I had a eye surgery. Everything went fine. The few weeks after the surgery I was still having a lot of pain. I wanted to crochet or paint or do anything but I just was so tired that I wasn't really able to (not to mention that I couldn't see very well!). The day after my eye surgery my brother and sister-in-law had their first child! My niece is so sweet and cute. I am so happy for them and I am excited to show you guys what I made for them for their baby shower in November.

Time to tell you about some of the projects that I have been working on during November and December.

So finally in November I finally had the chance to get to some of my Halloween crafts. I know, I know, Halloween was over with but at least I will have them for next year. The first Halloween project that I finished was some chunky candy corns that I got from The Wood Connection. You can click here to browse their amazing products that have got me addicted to creating their things!


These are the cute candy corn that I did.

In November a couple of my cousins and my aunt threw a baby shower for my sister-in-law for her and my brother's first child. They did a really good job with it!


This was the food table. They planned the colors with what my sister-in-law and my brother wanted for my niece's nursery. The nursery color theme was gold and pink.


This was the desert table.


This was the little favor that they passed out at the end. In the middle it has "It's a Girl".

I also made a blanket for her but I haven't taken a picture of it yet because I haven't finished it. I am so close and when I do finish it I will definitely post it and tell you guys how I did it.


I made this for my room! This paper was from last year at The Wood Connection and I think that it is so cute!


My manager's birthday was in November and we made a candy bar poster for her. All of the girls up front contributed with what it said!

On Thanksgiving my Mom did the cutest Thanksgiving party. She really does do an amazing job with parties, they are so fun and creative!


This is the placement for the kid's table. It really is so cute. Underneath the plate was a little word search that had to do with Thanksgiving.


This was the word search.


This was the setting for the adult table.


This was what my mom had waiting for me and my family when everyone got to my house.


It was made from a tootsie roll package and the paper was put on with glue dots.


This is what my mom gave to me, my sisters, and my sister-in-law. The circle with the face on it is an eos chapstick.
My mom did an amazing job with this party too!
You can go HERE to see the Halloween party that my mom did for my family!

The Saturday after Thanksgiving was my niece's birthday party! She turned 4 the day after Thanksgiving.


I painted this "E" for her. She loves Frozen so I did the color scheme for it as silver and a light blue.


This is my cute niece! She loved Shopkins around this time so she had to have a Shopkins birthday party. She was dressed up as the cupcake!

Finally at the end of November I finished my Halloween crafts! I know it was late but at least I will have them ready for this year. Here are a few that I finished.


I am happy that I did get all of my Halloween crafts done, a few less crafts that I won't have to do before next Halloween. I did get a few more done but I forgot to get pictures of them before I stored them away.

Here is what I did in December...

I started a couple of the stitch along blankets that Joann craft store did.


Here are both of them at the end of the first clue.


Here is the purple blanket after it was finished. I gave it to my grandma because she was the one that actually taught me to crochet!


This is me and my sweet grandma. She loved the blanket!


This is me and my sweet niece. Also my right eye, the one that you see, was the one that I had the surgery on. That is why it is so red.


I made this for my niece so that my brother and sister-in-law could put it in her nursery.

My mom had another amazing party on Christmas Eve! It was so cute.


This is the table setting.


This is a close up of the cute little basket that my mom had for all of us with Hershey kisses in them.


My mom also had a guessing game with two plastic ornaments that were filled with candy. I didn't win either one! I guess I am not that good with guessing games but my brother-in-law, Dallin, and my niece, Emma won! They were so happy.


My mom did a fruit basket for all of the married couples in the family. All of the cute things that she had matched perfectly!


My brother, Cody, gave my mom a huge goodie basket that we all loved picking on!


My sister, Brittany, gave all of us girls this nail polish with this cute saying.


My sister, RuthAnne, gave all of us girls this cute quote that she did in our calligraphy class last semester. You can go to RuthAnne's blog by pressing HERE.


I also got another blanket done!

So that was pretty much all of my November and December. It was a crazy two months. But a lot of great things happened during those two months. 

I hope everyone had a great New Year and a great first month in 2017!

~Bethany